


Pricing and Features
YouTube Video Editor is free to use for anyone who has an account, since users can only edit videos which are uploaded in their website. You can set the privacy setting of videos uploaded into your account as public, unlisted, or private. This means you can have the raw clips of your video listed in your library, hidden from the browsing community, and have it published later on and make it available for all to watch.
Ease of Use
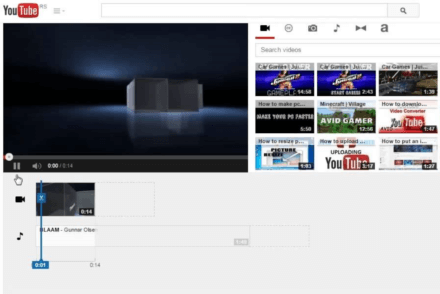
To start editing, you can simply drag and drop the video (or audio file) into the corresponding section on the lower part of the page. You can then crop the files just by sliding the edges of the file screenshot. Cropping is made convenient because you can see the exact part of the video that will be the last to show via the player. You can also add multiple files into the editing section and have them queued up in the editor so you can focus on the editing process itself.
If you want a closer look at the file for more precise splicing, you can use the magnifying tool at the lower right portion of the screen, where the video file’s timescale will be stretched to the milliseconds. With this feature, you can be more accurate when cropping a video and transitioning it to the next clip.
Simple Tools for a Classic Output
Clicking on the video file will show editing menus composed of sections such as quick fixes, filters, text, and audio. Under quick fixes, you can choose to auto-fix the video, or set the parameters of its brightness and contrast yourself. You can also put it into slow motion at 1, 2, 4, and 8 times slower than the normal speed, rotate the video, pan and zoom, and stabilize the shots to remove the “shakiness” that is prevalent in videos that are recorded on a handheld device.
Over at the Filters section, you can apply filters from several selections including but not limited to: HDR, lomo, cinemascope, black and white, sepia, thermal, pixelate, and many more. You can add several filters to a single file, and you can instantly see the effect of whatever combination you set via the preview player.
You can also add text with or without a banner behind it. They have several fonts, font sizes, and colors to choose from, and you can opt to have it bold or italicized, aligned to the left, center, or right, positioned at the top, center, or bottom, and have the banner’s color, height and opacity adjusted accordingly.
As for the audio, you can make adjustment to its volume, pan, bass, and treble. The same drag and drop and sliding gesture applies for the audio file, although you may want to check the licenses or apply any appropriate disclaimer when using any copyrighted music. They also offer a wide array of songs from a variety of genre that you can use freely in your project.
Additional Tools and Effects
Aside from those already mentioned, you can also add other elements into your project. You can add photos via upload or by choosing the ones stored in your Google+ account. As for transitioning between photos or videos, they offer the usual animations like cross fade and cross blur, plus creative ones like horizontal and vertical blinds, checkerboard, and shape-based cutouts like heart, star, diamond, and circle. For video titles, you can make things more interesting via a handful of effects. You can, for example, make it so that it will fade after a few seconds, unlike regular text that appears for the entire duration of the video.
Simple Yet Flexible
YouTube Video Editor is designed for users who want to be able to make basic edits and add effects to their videos. You won’t see any advanced tools found in other, more robust, video editing programs, but you also won’t have to wait for hours for the final product to be ready for publishing. The editor is great for making a mashup of your uploaded clips, or just any video presentation that is straightforward in design. Given the sheer simplicity and ease of use of the tool, any user can edit their videos on the spot without any difficulty or the need to spare a huge amount of time just to finish the task. Moreover, since you are doing the editing under YouTube’s roof, you can immediately upload the finished product to your account and let everyone watch and see what you have created.
Customer Service
As the largest video sharing website to date, you can find tutorial videos made by users on YouTube itself, in case you are not quite familiar with their system. They also have a well-written help center that contains articles on using their editor. They may not have a direct communication channel for getting in touch with their support team, but they do have a forum where YouTube experts can help out on posted issues and concerns. Aside from guides to get you familiarized with the technical aspects of their editor, they also have a creator academy where you can watch tips and tricks on how to make your videos more enticing and possibly score a large chunk of viewers.
What's the Verdict on YouTube Video Editor?
YouTube Video Editor 2019 – Conclusion
YouTube Video Editor may not be the most ideal online editing tool for more advanced creators who like to fine tune every single aspect of their videos, but it provides the basics in video editing and does not have a steep learning curve, making it perfect for new users and less tech-savvy individuals. In fact, you can literally understand the interface in just one look. Aside from cropping and slicing properties, there are also a handful of effects and animations thrown in for good measure that can add a little more spice to your videos. Most of all, there is no limit to using the editor, and it is absolutely free to use. If you are looking to give your video a quick fix without any complications before sharing it to the world, then go on straight to YouTube Video Editor.
No Comments... Yet!